Troubleshooting the Retention ClipUpdated 2 months ago
— Retention Clip TS —
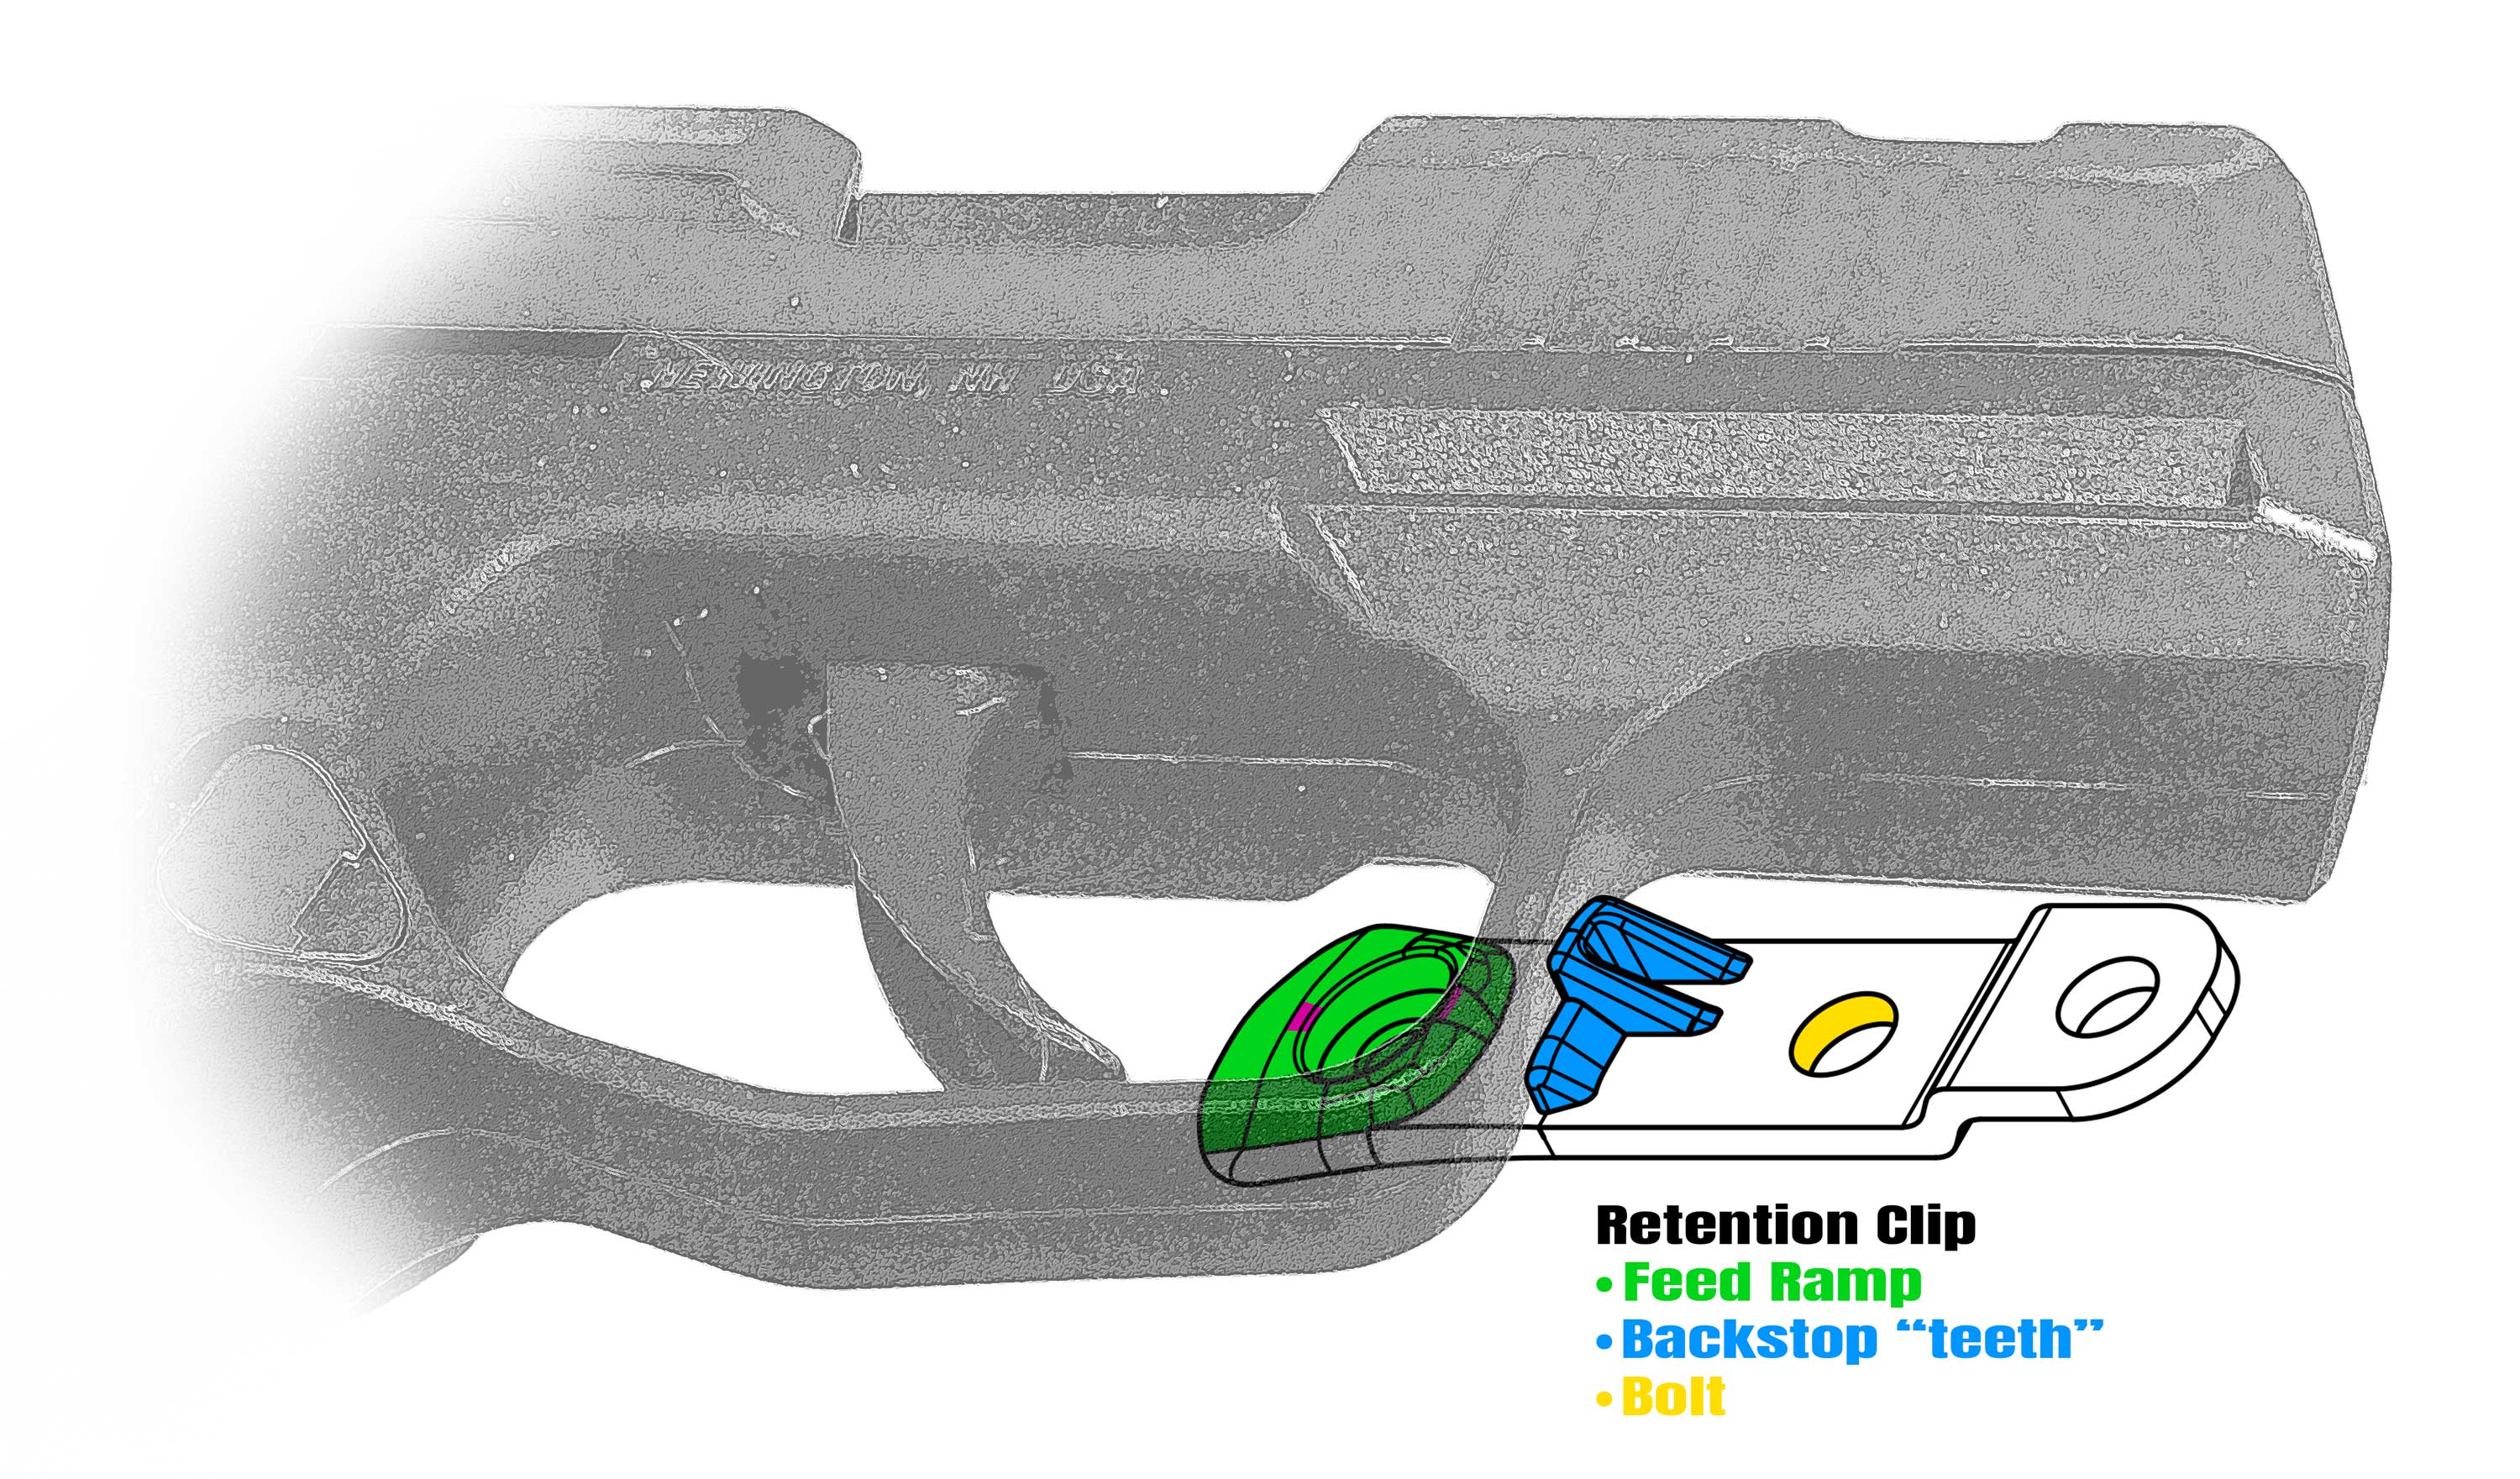
To better understand the retention mechanism of your holster, take a look inside using a flashlight. You’ll notice two offset, plastic-like "teeth" at the bottom—these are actually the backstops designed to support your trigger guard, not the retention mechanism itself.
In front of these backstops, you’ll see two raised circular pieces of kydex on opposite sides of the holster. These are the actual locking points that secure your trigger guard. To ensure proper retention, these circular pieces need to be positioned close enough so that the trigger guard engages them, rather than sliding past without contact.
To adjust retention:
- Use a Phillips head screwdriver to tighten the retention screw until the end of the screw is flush with (or slightly protruding from) the opposite side of the holster. You’ll see a flathead side with a hole—align the screw with this.
- Insert your unloaded and cleared firearm into the holster. You may hear a click or bump, indicating the trigger guard is locking in place.
- If the fit is too tight, loosen the screw a quarter turn at a time, reinserting the firearm after each adjustment until you achieve your desired retention level.
For a visual reference, please check the image below. The retention clips function as a mirror image, securing the trigger guard both above and below. The offset design of the backstop teeth is intentional and part of the holster’s structure.
For further details on the retention clips, please see the following resources:
- Retention Clips Video: https://vimeo.com/446605634
- LockLeather Retention Function: https://urbancarryholsters.com/retention-clip
If you have any other questions, feel free to ask—we’re happy to help!